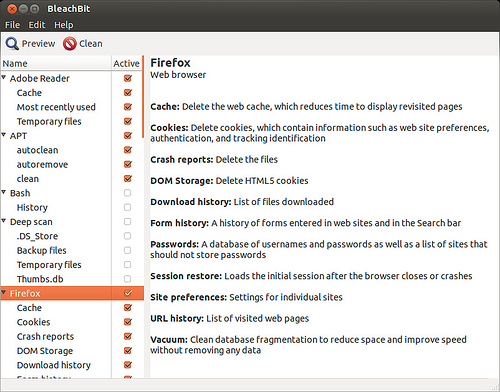
If you have an aged Linux system, chances are that you have a lot of disk space wasted due to things like application-specific caches (e.g., browser caches), system caches (e.g., apt cache), unnecessary locale files or other temporary files. With so many different ways files are generated, it is hard to track down the wasted disk usage, and free up disk space appropriately.
BleachBit is an open-source disk space cleaner software, available on Linux and Windows platforms. Besides cleaning up disk space, BleachBit can also shred files securely, and wipe out unallocated disk space for your privacy.
In this tutorial, I will describe how to clean up disk space on Linux by using BleachBit.
BleachBit Features
BleachBit has a number of features that make it an essential tool for disk cleaning and privacy protection:
- A growing list of application-specific cleaners.
- File shredding to prevent data recovery.
- Overwrite unallocated disk space to hide traces of deleted files.
- Command line interface for automated disk cleaning.
- Clear the memory and swap space.
- Clean up broken shortcuts.
- Clean up package management systems (e.g., apt and yum).
- CleanerML markup language for writing your own custom cleaners.
Install BleachBit on Linux
BleachBit’s official website offers installation packages for popular Linux distributions. Download an appropriate package for your system, and install it along with its dependencies as follows. BleachBit requires Python >= 2.5 and <=2.7, and PyGTK 2.14 or later.
To install BleachBit on Ubuntu:
$ sudo apt-get install python-gtk2 python-simplejson
$ sudo dpkg -i bleachbit_0.9.6_all_ubuntuXXXX.deb
To install BleachBit on Debian:
$ sudo apt-get install python-gtk2 python-simplejson
$ sudo dpkg -i bleachbit_0.9.6_all_debianX.deb
To install BleachBit on Fedora:
$ sudo yum install pygtk2 python-simplejson
$ sudo rpm -ivh bleachbit-0.9.6-1.1.fcXX.noarch.rpm
To install BleachBit on CentOS 6:
$ sudo yum install pygtk2 python-simplejson
$ sudo rpm -ivh bleachbit-0.9.6-1.1.centosCentOS-6.noarch.rpm
Configure BleachBit
To launch BleachBit, simply run:
$ sudo bleachbit
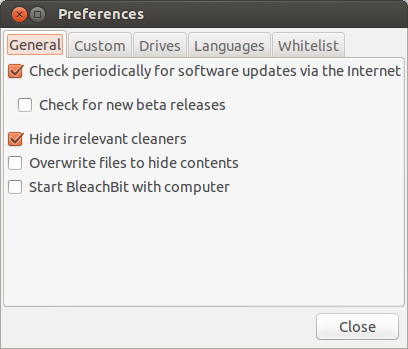
The first time you run BleachBit, you will be asked to configure the preferences of BleachBit. You can also enter the preferences settings any time, by going to “Edit” -> “Preferences” menu.
In the preference settings, you can control the following options.
- Check periodically for software updates via the Internet: Notify you of any new update of BleachBit.
- Hide irrelevant cleaners: Show you relevant cleaning options tailored to your system.
- Overwrite files to hide contents: Perform file shredding to prevent data recovery.
- Start BleachBit with computer: Auto-start upon boot.
- Language setting: Specify language(s) to exclude from disk cleaning.
- Folder/file whitelisting: Specify a list of paths that will be excluded from disk cleaning.
Clean Up Disk Space with BleachBit GUI
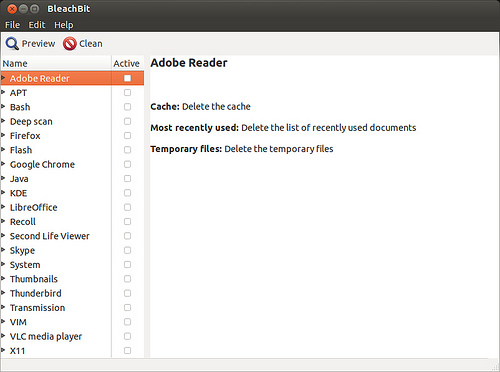
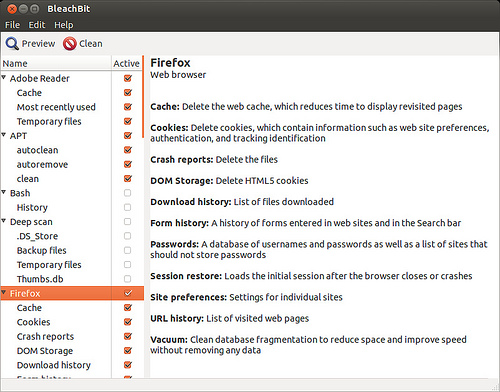
The main window of BleachBit shows a list of available cleaners in the left panel. The complete list of cleaners may vary depending on your Linux system setup, since BleachBit automatically hides irrelevant cleaners. If you click on any cleaner, you will see corresponding cleaning items.
You can selectively enable a particular cleaner and particular cleaning items underneath it.
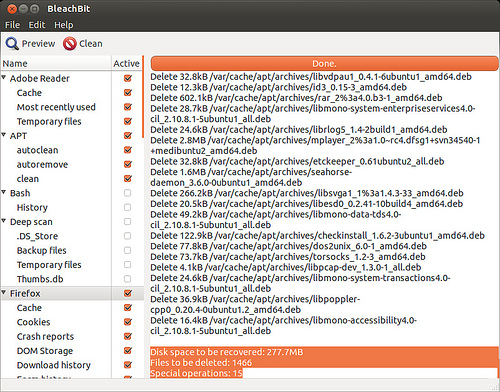
Once you are done with cleaner selection, click on “Preview” button at the top bar. You will see a list of actions to be performed during disk cleaning, and check how much disk space will be recovered once cleaning is done.
Clean Up Disk Space from the Command Line
One nice feature of BleachBit is the fact that you can run BleachBit in command line mode. Thus you can easily schedule a cron job to clean your Linux system periodically.
To see a list of available cleaning items:
$ bleachbit –list
info: starting BleachBit version 0.9.6
adobe_reader.cache
adobe_reader.mru
adobe_reader.tmp
amsn.cache
amsn.chat_logs
amule.logs
amule.tmp
apt.autoclean
apt.autoremove
apt.clean
. . .
To preview the result (i.e., individual deletions and final disk space savings) of a particular cleaner:
$ bleachbit –preview apt.clean apt.autoremove
info: starting BleachBit version 0.9.6
debug: clean_operation('apt'), options = '['clean']'
Delete 1.1MB /var/cache/apt/archives/keepassx_0.4.3-1ubuntu3_amd64.deb
Delete 81.9kB /var/cache/apt/archives/libaudiofile1_0.3.4-1_amd64.deb
Delete 1.5MB /var/cache/apt/archives/tor-geoipdb_0.2.3.25-1~quantal+1_all.deb
Delete 217.1kB /var/cache/apt/archives/duplicity_0.6.19-0ubuntu2.2_amd64.deb
. . .
Disk space to be recovered: 107.9MB
Files to be deleted: 56
To conduct actual disk cleaning job:
$ sudo bleachbit –clean apt.clean apt.autoremove
To conduct actual disk cleaning job and overwrite contents of deleted files:
$ sudo bleachbit –overwrite –clean apt.clean apt.autoremove

